Monday, August 4, 2008

Digital clock

Used the step below :
  1. Insert 3 layers in your timeline window and name them :background text and actions


  2. Select Frame1 of background layer, Design the framework for your digital clock.
  3. Select frame2 and press F5

  4. Now go to Frame1 of your text layer and insert Dynamic text field in your work area. Select frame2 and press F5

    To insert a Dynamic text field- Select text tool from your tool box,
    Select Dynamic text from Text pop-up menu in the Property inspector.
    Click on your work area wherever you want the digital clock to appear.

  5. Nad then take a name this Dynamic text field instance as "clock_txt"
  6. On frame1 of actions layer,Insert the below mentioned script in the action panel

    time=new Date(); // time object
    var seconds = time.getSeconds()
    var minutes = time.getMinutes()
    var hours = time.getHours()
    if (hours<12)
    { ampm = "AM"; } else{ ampm = "PM"; }
    while(hours >12){
    hours = hours - 12;
    }
    if(hours<10)
    { hours = "0" + hours; }
    if(minutes<10)
    { minutes = "0" + minutes; }
    if(seconds<10)
    { seconds = "0" + seconds; }
    clock_txt.text = hours + ":"
    + minutes + ":"
    + seconds +" "
    + ampm;


  7. On frame2 of actions layer and press F6 to insert a new keyframe.
    Still keeping the play head on the frame2, go to action panel and copy paste the below mentioned script.

    gotoAndPlay(1);

It is very simple & now we can play movie

Sunday, August 3, 2008

Insert sound

Insert your sound to your flash !
  • File > Import to import a sound file. Locate the sound file and click Open. The sound file will be saved in the Library.
  • Click in the first frame of "Layer 1" in the Timeline. Choose Window > Panels > Sound from the top menu.
  • In the pop up window (Sound) choose the sound you imported in the Sound field. Choose Stream in the Sync field. Close the pop up window.
  • Go to frame 50 in the Timeline. Right click and choose Insert Frame.
  • Control > Test Movie from the top menu to test your Flash movie.
Lets try.....

Monday, July 28, 2008

Inset

1.

Start with opening your image.

2.
Push down the Ctrl-button and left-click the image layer to select your image.
Now go to Selection - Modify - Expand - 2 pixels. (For larger images you’ll need to insert 3-4 pixels).
Create a new layer - call it white shadow - and place it beneath your image layer.
Select White as your foreground colour and flood fill your selection (choose the Paintbucket and select foreground in the options window on the top right side of your screen).
Your image should now look like fig. 2.

Keep your selection and create a new layer over the white shadow layer and beneath the image layer and call it black shadow.
Select black as your foreground colour and flood fill your selection.
Now deselect (Ctrl - D).

3.
Still at the black shadow layer choose Filter - Blur - Gaussian Blur and insert 1,5 - 2 pixels.
I used 1,9 pixels. Click ok.
Activate the white shadow layer and repeat the Gaussian Blur effect - fig. 3.


4.
Now we have to move the two shadow layers a little bit to get the wanted effect. Still at the White shadow layer select the Move Tool ( see fig. 4).
Now we have to move the white shadow layer one pixel down and one pixel to the left (for larger images move 2-3 pixels….). Use the arrowkeys on your keyboard to move the layer. (One touch at the down-arrow = one pixel down etc.).
Now select the black shadow layer. Now move this layer one pixel up and one pixel to the right.


5 Finished ! Lets try now!

Logo of Flash

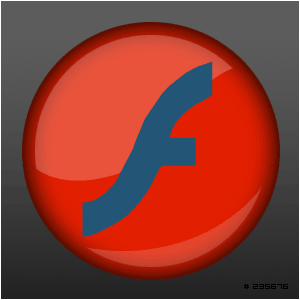
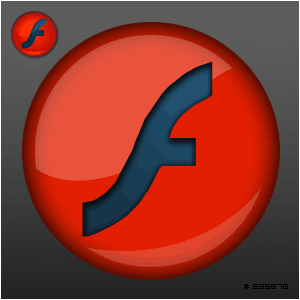
Duplicate of Flash Logo :

Have you seen the thumbnail in your Start-Menu? Now you can make it...

  • Step 1 First create an orb and fill it with #E21F01;

    Macromedia Flash-logo

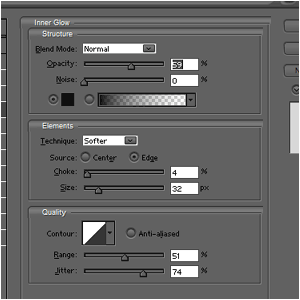
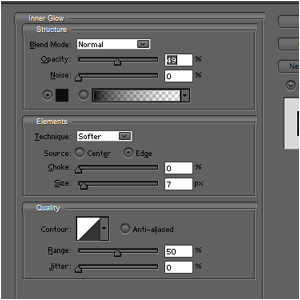
  • Step 2 Add an inner glow;

    Macromedia Flash-logo

    Macromedia Flash-logo

  • Step 3 Make a smaller circle and fill it with white, then duplicate it;

    Macromedia Flash-logo

  • Step 4 Use the Elliptical Marquee-Tool to cut off most of the white and then lower the opacity;

    Macromedia Flash-logo

  • Step 5 On the second white orb, do another effect that can be done with the help of the pen-tool;

    Note:IF YOU'RE NOT GOOD WITH THE PEN-TOOL, USE THE ELLIPTICAL MARQUEE-TOOL.

    Macromedia Flash-logo

  • Step 6 Add any logo or just the Flash-logo and fill it with #235676;

    Macromedia Flash-logo

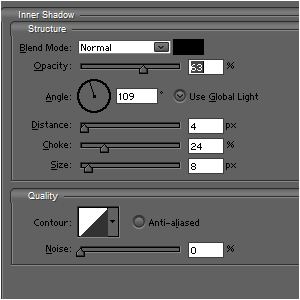
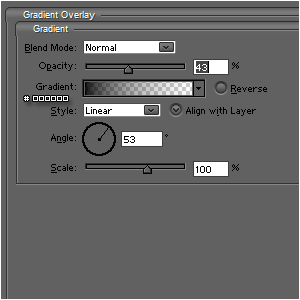
  • Step 7 Add these blending-options to the logo;

    Macromedia Flash-logo

    Macromedia Flash-logo

    Macromedia Flash-logo

  • Step 8 And then you can add anything you like...

    Macromedia Flash-logo

Now..you have a flash logo duplicate.....It's so easy....lets try

Sunday, July 27, 2008

Free Download Flash


Download Link :

Click here to download the trial version of Flash free.

Oval Tool

The Oval Tool

In the exercise that follows, you will use the Oval tool to draw an ellipse. You will then turn the ellipse into a symbol. Symbols are reusable graphics you store in the Library. Later in the tutorial you will turn the ellipse into the button movie viewers press to start the movie.

To draw the ellipse:

  1. Choose the Oval tool. There are two color boxes on the Modifier panel. These color boxes are used to set the stroke and fill colors. The stroke color outlines your drawing. The fill color fills the center of your drawing.

Toolbar

  1. Click the Stroke Color box and then click the color black to choose black as your stroke color.
  2. Click the Fill Color box and then click the color navy to choose navy as your fill color.
  3. If selected, click to deselect the Object Drawing option. The Object Drawing option enables you to draw your ellipse as a grouped object that will not merge with other objects you draw. You want this option turned off.

You set the thickness of the Stroke line in the Property inspector. To set the thickness of the Stroke line:

  1. If the Property inspector is not open, choose Window > Properties> Properties from the menu. The Property inspector appears at the bottom of the screen.

Property inspector

  1. Choose Solid from the drop-down menu to select the type of line that will outline your drawing.
  2. Type 3 in the Stroke Height field to set the line thickness.
  3. Click on the Stage and drag diagonally to draw the ellipse.

Ellipse

Note: You can also use the Property inspector to set the stroke and fill colors.

The Grid

Use the grid

  1. Choose View > Grid > Edit Grid from the menu. The Grid dialog box opens.

Grid

  1. Click the Color box and select gray to have the grid lines display in gray.
  2. Choose Show Grid to cause the grid to display.
  3. Choose Snap to Grid to cause the edges of your graphic to align with the grid lines.
  4. Set the Horizontal field Horizontal field to 20 px to separate horizontal lines by 20 pixels.
  5. Set the Vertical field Vertical field to 20 px to separate vertical lines by 20 pixels.
  6. Set the Snap Accuracy to Normal.
  7. Click OK.

The Property Inspector

In the Property inspector, you can set the attributes of objects as you work. You will use the Property inspector frequently when working in Flash Professional 8. To open the Property inspector:

  • Choose Window > Properties> Properties from the menu. The Property inspector appears at the bottom of the screen.

Property inspector

The Property inspector is one of many panels found in Flash. When you are not working in a panel, you can collapse the panel. To collapse the Property inspector, click the Collapse icon. To open the Property inspector again, click the Expand icon.